Dr Simona Cuevas, D.D.S.
The dreaded “black triangles” in the anterior region seem to be one of the hardest dental restorative treatments to perform, not due to the fact that they are large, complicated restorations, but due to the fact that their small size and great effect on esthetics, coupled with its possible impact on the adjacent gingival tissues, create a struggle for the practitioner.

With our increasingly aging dental population, the clear professional understanding of the particular reasons for why they were formed (since the reasons for their appearance can be due to multiple causes), improvement in oral health in general, and the statistical fact that more people actually seek dental care, dentists find themselves asked to fix “black triangles” for cosmetic purposes more than before. Properly diagnosing the specific reason for the formation of the black triangles is of course the priority and addressing it will prevent their reoccurrence. For the purpose of this article, we will now forward to the cosmetic restoration technique. This particular patient had a previous diagnosis of uncontrolled periodontitis and bruxism, which were both addressed prior to the cosmetic rehabilitation.
While techniques and adjunctive tools differ, our search for the easiest, most reliable and cost-effective treatment method is continuous. As dentists, we all seem to want to be able to improve on a patient’s esthetics but know that improperly performed procedures can ultimately cause more damage than help.
When closing “black triangles” between anterior teeth what are the steps one needs to be mindful of?
1. Tissue health. Loss of interdental papillae or its fullness is always related to physical or microbiological trauma. This issue needs to be resolved prior to the commencement of any restorative treatment especially an esthetic one.
2. Bonding technique and composite choice. The success of direct bonding is directly related to the proper technique implementation rather than the choice of a certain manufacturer’s system.
All reputable company’s bonding systems work very well, as long as one follows their application instructions exactly. Composite choice in modern dentistry is subjective, due to the handling and esthetic choices one has with different composites. I advocate for using a bonding system with a composite, both made by the same manufacturer, due to the fact that they were developed congruently, and have therefore the best chance of working very well together.
3. Implementation of the proper matrix system. To aid in the proper sculpting and placement of the composite, one needs to carefully select a matrix system that will aid in the closing of the “black triangles” without making the treatment modality harder than it already is. We are all familiar with the dreaded Mylar bands that always leave us with huge marginal overhangs, or the more modern curved Mylar systems that, due to the fact that they are made from thin plastic, cannot be burnished into the needed space.
4. Proper curing and polishing of the placed composite. This is where the struggles begin, if one has not picked a good interproximal matrix system, the composite to tooth interface that needs to be left exceptionally smooth, could become misshapen in the process.
Case study:
A 60-year-old female patient presented with dissatisfaction with the “black triangles” present between her anterior teeth, after a long but ultimately successful battle with inflamed gingival tissues. This patient is also a severe nighttime bruxer who wears a TMJ appliance (splint) at night.
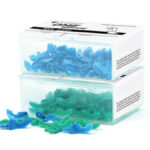
The choice was made to use the new Fusion Anterior Matrix System by Garrison Dental Solutions.
This system differs in the fact that the wedges are pre-curved, and the metal interproximal matrix is pre-bent. What is particularly useful with these metal bands, is the fact that they can be burnished, and they hold their shape, throughout the procedure. The ingenious pre-curved wedges add to the proper composite placement, not allowing for marginal material seepage.
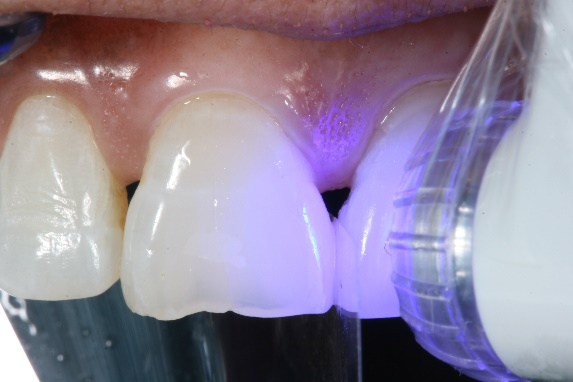
Although one cannot light-cure through the metal matrix, light-curing from the side of the placed composite on facial or lingual is extremely easy, without scare of leaving uncured composite due to two main facts: firstly, the fact that modern composites cure through a minimum of 3 millimeters, and secondly, composite thickness in that area is generally not thicker than that given natural anterior tooth morphology.
The below depicted case shows a step-by-step implementation of this new anterior interproximal matrix system and its seamless integration into our procedural routine for the esthetic treatment of “black triangles” in the anterior region.
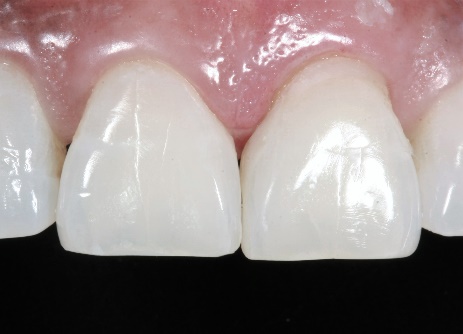
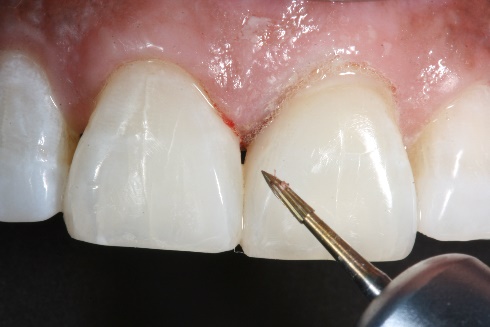
1. The before picture shows the blunted papilla between teeth #s 8 and 9, abfraction on #9, and incisal wear on #8.
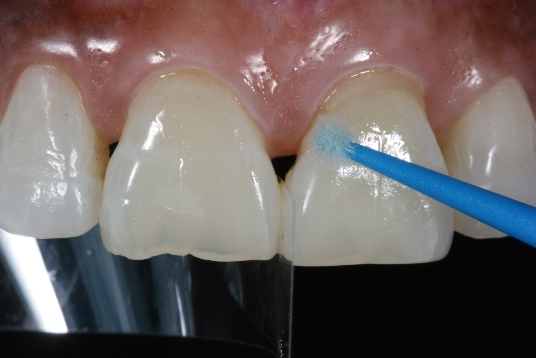
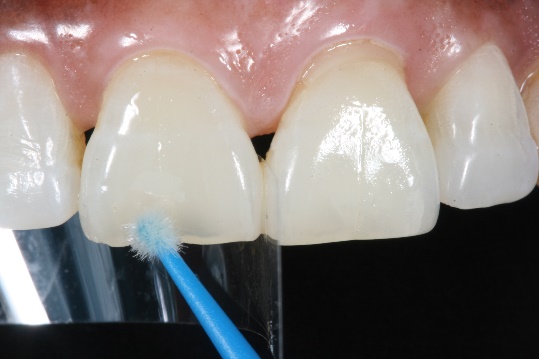
2. Micro abrasion to remove all interproximal superficial staining was completed, enamel and cementum were etched with 37% phosphoric acid (by Kerr Dental) and rinsed for a “total-etch” bonding technique. OptiBond Universal (by Kerr Dental) was applied on all etched surfaces in a one-coat application, as per manufacturer recommendations.
3. Bonding was cured for a complete 20 seconds. A mylar strip was placed interproximally only during the bonding application to ensure the teeth separation.
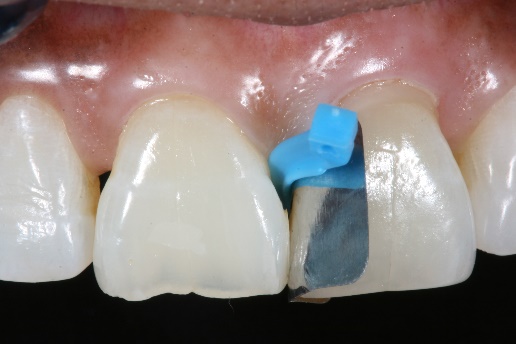
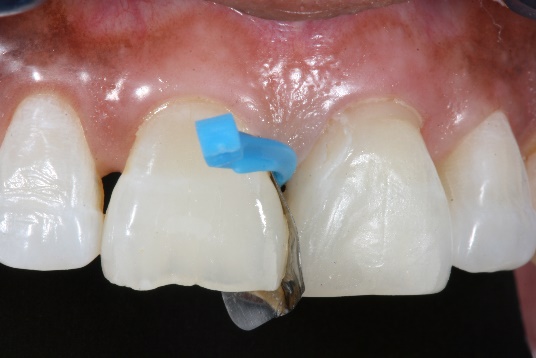
4. The anterior, interproximal matrix (Fusion Anterior Matrix System) was placed around the defect on tooth #9 and secured in place.
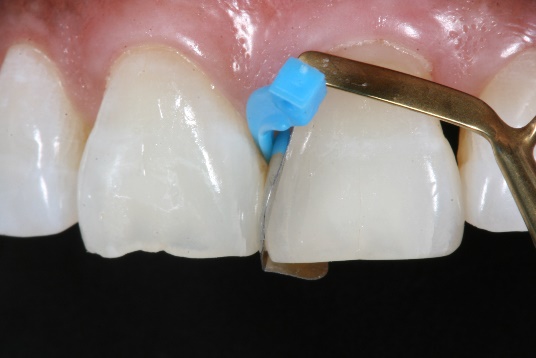
5. SimpliShade universal composite in the lightest shade (by Kerr Corporation) was then placed into the space between the tooth and the matrix band.
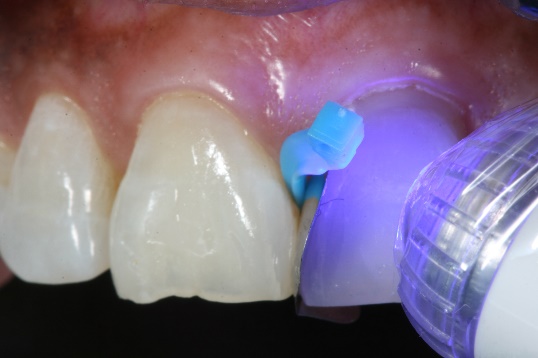
6. The composite was light cured for 20 seconds.
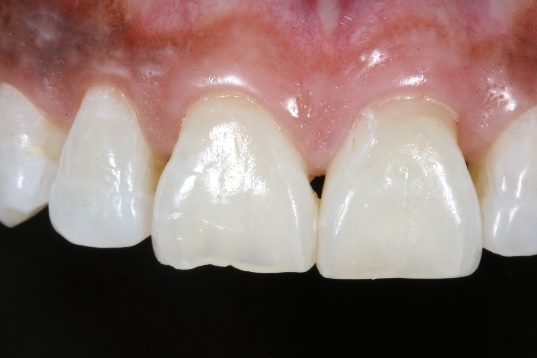
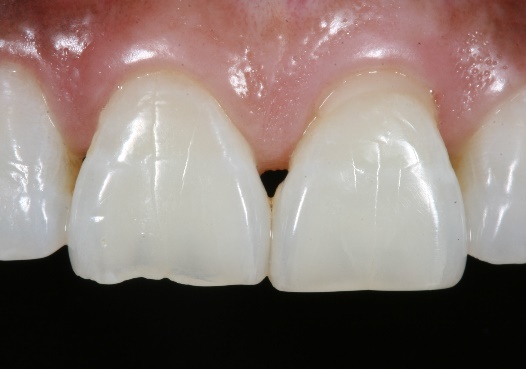
7. Completed composite restoration after matrix removal on tooth #9.
8. Following micro abrasion to remove all interproximal superficial staining, enamel and cementum were etched with 37% phosphoric acid (by Kerr Dental) and rinsed for a total etch bonding technique. OptiBond Universal (by Kerr Dental) was applied on all etched surfaces in a one coat application, as per manufacturer recommendations.
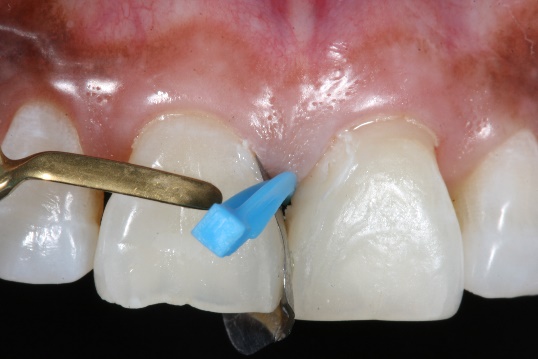
9. The anterior, interproximal matrix (Fusion Anterior Matrix System by Garrison Dental Solutions) was placed for tooth #8. It is important to note that the curved wedge can be reinserted in a rotated position as one places the composite into the defect in order to achieve a better contour of the restoration.
10. Application of composite on tooth #8.
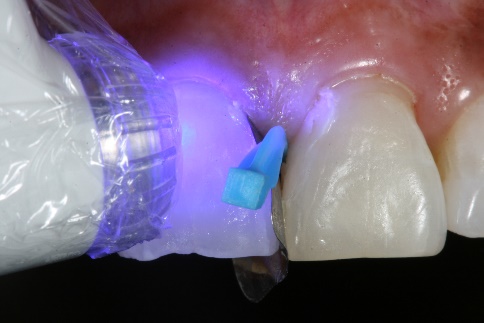
11. The composite was then light cured.
12. After restoration of the incisal defect with the same composite, all composites were first contoured with a carbide finishing bur (BluWhite Carbide bur by Kerr Dental).
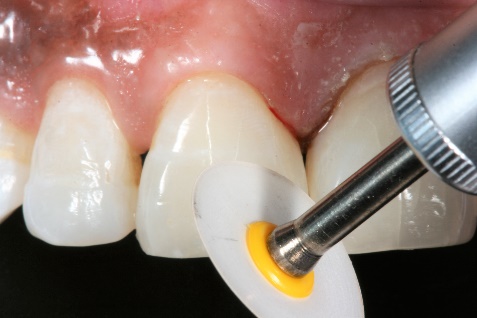
13. All restorations were then polished using the Optidisc polishing system (by Kerr Dental).
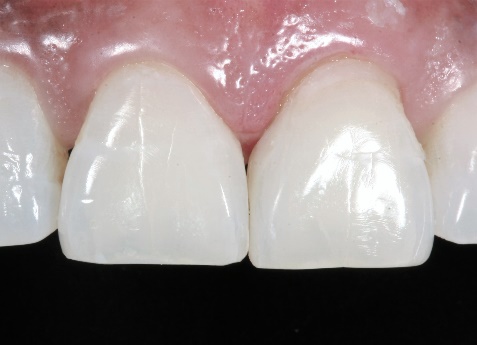
14. Final restorations in place.
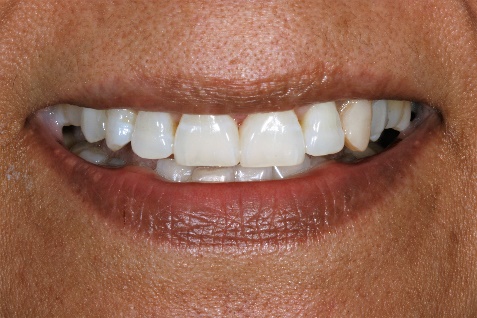
15. Completed treatment – full smile.
For more information on the full range of Garrison Dental products please contact Gina Davies at Garrison Dental Solutions via email: gdavies@garrisondental.com or call 0416 232 252.
Dr Simona Cuevas, D.D.S.
Dr. Simona Cuevas received her D.D.S. from the University of Texas, San Antonio in 1995, where, post-graduation, she also served on the faculty in the Esthetic Restorative department for several years. She is a member of numerous dental associations and has served as a contributing editor for the Journal of Cosmetic Dentistry, writing many articles. Dr. Cuevas has published numerous professional articles on direct and indirect bonding techniques. Dr. Cuevas has become known for being at the forefront of implementing new techniques and materials into the restorative esthetic dental space. She has lectured nationally and internationally on esthetic dentistry. She is an active consultant for several dental manufacturers in the area of new product development and refinement, and
she is considered a Key Opinion Leader in the Dental industry. Dr. Cuevas maintains a private practice, The Institute of Esthetic Dentistry, in San Antonio, Texas, emphasizing esthetic and restorative dentistry, and is a Clinical Faculty Assistant Professor at the University of Texas School of Dentistry in San Antonio.
References:
1. Esthetic Reconstruction of Diastema with Adhesive Tooth-Colored Restorations and Hyaluronic Acid Fillers Supawadee Naorungroj Case Rep Dent. 2017; 2017: 5670582. Published online 2017 Mar 12. doi: 10.1155/2017/5670582
2. Minimally Invasive Use of Coloured Composite Resin In Aesthetic Restoration Of Periodontally Involved Teeth: Case report
M.A. Wahbi, H.S. Al Sharief, H. Tayeb, A. Bokhari; Saudi Dent J. 2013 Apr; 25(2): 83–89. Published online 2013 Mar 14. doi: 10.1016/j.sdentj.2013.02.001
3. Perception of Smile Esthetics by Laypeople Of Different Ages
Chompunuch Sriphadungporn, Niramol Chamnannidiadha; Prog Orthod. 2017; 18: 8. Published online 2017 Mar 20. doi: 10.1186/s405
4. Restoration of Gingival Recession with Periodontal Preformed Composite Veneers Claudio Novelli Clin Case Rep. 2021 Mar; 9(3): 1135–1145. Published online 2021 Jan 19. doi: 10.1002/ccr3.3693
5. Diastema Closure in Anterior Teeth Using a Posterior Matrix Ayush Goyal, Vineeta Nikhil, Ritu Singh Case Rep Dent. 2016; 2016: 2538526. Published online 2016 Oct 13. doi: 10.1155/2016/2538526
6. Minimally Invasive Diastema Restoration with Prefabricated Sectional Veneers Claudio Novelli, Andrea Scribante Dent J (Basel) 2020 Jun; 8(2): 60. Published online 2020 Jun 24. doi: 10.3390/dj8020060
7. Esthetic Rehabilitation of Single Anterior Edentulous Space Using Fiber-reinforced Composite Hyeon Kim, Min-Ju Song, Su-Jung Shin, Yoon Lee, Jeong-Won Park Restor Dent Endod. 2014 Aug; 39(3): 220–225. Published online 2014 May 19. doi: 10.5395/rde.2014.39.3.220
8. Papillary Reconstruction and Guided Tissue Regeneration For Combined Periodontal–endodontic Lesions Caused By Palatogingival Groove And Additional Root: A Case Report Hui Miao, Min Chen, Tsetsen Otgonbayar, Sha Sha Zhang, Min Hong Hou, Zhou Wu, Yong Lan Wang, Li Geng Wu Clin Case Rep. 2015 Dec; 3(12): 1042–1049. Published online 2015 Nov 6. doi: 10.1002/ccr3.441


